Author

lexileighzz

Browsing

Hey there, fabulous friends! Are you ready to start your day with a zesty burst of energy and a sprinkle of superfood magic? Look no further because I’ve got the perfect morning potion for you: Lemon Chia Seed Water! 🍋🌱 Trust me, this delightful drink will have you leaping out of bed with a smile on your face and a pep in your step. Let’s dive into the bubbly goodness of why this refreshing concoction is a game-changer for your mornings.Lemon chia seed water

1. Hydration Sensation 💧

First things first, staying hydrated is key to feeling fabulous all day long. Lemon chia seed water is a hydration powerhouse! The chia seeds absorb up to 12 times their weight in water, creating a gel-like texture that keeps you hydrated for longer. Plus, the lemon adds a tangy twist that makes plain water oh-so-exciting. Sip on this citrusy delight, and wave goodbye to dehydration blues!

2. Boost Your Metabolism 🔥

Who doesn’t want to kickstart their metabolism first thing in the morning? Lemon juice is a natural metabolism booster, and when paired with chia seeds, it creates a dynamic duo that revs up your body’s engine. This means you’ll be burning calories more efficiently throughout the day. Hello, natural energy boost!

3. Fiber-Filled Fun 🍃

Chia seeds are tiny but mighty when it comes to fiber content. Just one tablespoon of these little wonders packs a whopping 5 grams of fiber! Fiber is essential for keeping your digestive system happy and healthy. Say goodbye to sluggish mornings and hello to smooth sailing with each sip of lemon chia seed water.

4. Antioxidant Powerhouse 💪

Lemons are bursting with vitamin C, a powerful antioxidant that helps combat free radicals and boosts your immune system. Starting your day with a dose of lemon chia seed water means you’re giving your body the antioxidant support it needs to stay strong and vibrant. Plus, chia seeds bring their own set of antioxidants to the table, making this drink a double whammy of wellness!

5. Glowing Skin, Here We Come! ✨

Who doesn’t want radiant, glowing skin? The hydrating and detoxifying properties of lemon chia seed water work wonders for your complexion. Vitamin C from the lemon promotes collagen production, helping your skin stay firm and youthful. Meanwhile, chia seeds’ omega-3 fatty acids nourish your skin from the inside out, leaving you with that coveted healthy glow.

6. Natural Detox Delight 🌿

Our bodies need a little detox love every now and then, and lemon chia seed water is here to help. Lemons are natural detoxifiers, helping to flush out toxins and support liver function. Chia seeds aid in the elimination process, making sure everything moves smoothly. Cheers to a clean and happy body!

7. Easy Peasy Lemon Squeezy 🍋

Making lemon chia seed water is as easy as pie—well, actually, way easier than pie! Here’s a quick recipe to get you started:

Ingredients:

  • 2 tablespoon of chia seeds
  • 1 lemon (juiced)
  • 1 glass of water (about 8-10 ounces)
  • A drizzle of honey or a pinch of stevia (optional, for a touch of sweetness)

Instructions:

  1. Add chia seeds to your glass of water.
  2. Squeeze in the fresh lemon juice.
  3. Stir well and let it sit for about 10 minutes so the chia seeds can absorb the water and swell up.
  4. Add a touch of sweetness if desired, and give it another good stir.
  5. Enjoy your refreshing and nourishing lemon chia seed water!

So there you have it, folks! Lemon chia seed water is your new morning BFF, bringing a splash of sunshine and a whole lot of health benefits to your day. Give it a try and watch your mornings transform into a bubbly, fun, and fabulous experience. Cheers to health and happiness! 🌟🥂

My Favorite Chia Seeds

This article contains affiliate links. Whenever you buy something through one of these, I get a small commission, without any extra cost to you.  Thank You!

Hey there, gorgeous! 🌟

Ever heard of oil pulling? If not, you’re in for a treat! This ancient Ayurvedic practice is the latest buzz in the wellness world, and it’s here to transform your dental routine. Imagine waking up every day with a dazzling smile, fresher breath, and a healthier mouth—all thanks to a simple, natural technique. Ready to dive in? Let’s go!

What on Earth is Oil Pulling?Woman holding coconuts. Oil pulling for oral health.

Oil pulling is like a mouthwash, but way cooler and natural. It involves swishing oil (usually coconut, sesame, or sunflower) around in your mouth for about 15-20 minutes. The idea is that the oil “pulls” out all the nasty stuff—bacteria, toxins, and plaque—leaving your mouth cleaner and healthier. Think of it as a mini spa treatment for your mouth!

Why Should You Try Oil Pulling?

  1. Whiter Teeth: Forget expensive whitening treatments! Oil pulling can naturally whiten your teeth over time. Coconut oil, in particular, has natural antibacterial properties that help keep your pearly whites shining bright.
  2. Fresh Breath: No one likes bad breath, right? Oil pulling helps banish bad breath by eliminating the bacteria responsible for it. Say hello to fresh, minty mornings!
  3. Healthier Gums: If you’re dealing with gum issues like bleeding or inflammation, oil pulling can be a game-changer. It helps reduce bacteria that cause gum disease, keeping your gums pink and healthy.
  4. Detoxification: Oil pulling isn’t just good for your mouth; it benefits your entire body. By reducing the bacteria and toxins in your mouth, you’re supporting your immune system and overall health.
  5. Improved Oral Hygiene: Regular oil pulling can help prevent cavities and reduce plaque buildup. It’s like giving your mouth an extra layer of protection against the baddies!

How to Oil Pull Like a Pro

Ready to give it a whirl? Here’s a step-by-step guide to get you started:

  1. Choose Your Oil: Coconut oil is a favorite due to its pleasant taste and antibacterial properties. You can also use sesame or sunflower oil if you prefer.
  2. Measure Up: Scoop out about a tablespoon of your chosen oil. If you’re new to oil pulling, start with a smaller amount and work your way up.
  3. Swish Away: Pop the oil in your mouth and start swishing! Gently move the oil around, pushing and pulling it through your teeth. Try to relax—this is your “me-time.” Swish for 15-20 minutes. If it feels too long, start with 5-10 minutes and build up.
  4. Spit It Out: When you’re done, spit the oil into the trash. Avoid spitting into the sink to prevent clogs. The oil will have mixed with bacteria and toxins, so you don’t want that going down the drain.
  5. Rinse and Shine: Rinse your mouth thoroughly with warm water. For an extra fresh feeling, you can brush your teeth afterwards.
  6. Smile!: Look in the mirror and admire your radiant smile. You just gave your mouth a fantastic workout!

Pro Tips for Oil Pulling Success

  • Morning Magic: Try to oil pull first thing in the morning on an empty stomach for the best results.
  • Consistency is Key: Like any routine, consistency matters. Aim to oil pull 3-4 times a week for noticeable benefits.
  • Stay Hydrated: Drinking water after oil pulling can help flush out any remaining toxins.

So, are you ready to embrace this ancient practice and revolutionize your dental routine? Give oil pulling a try, and get ready to flaunt that gorgeous, healthy smile! 🌸✨

Stay radiant and keep smiling, Lexi

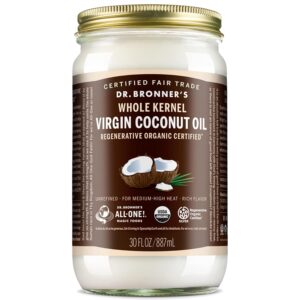
My Favorite coconut oil for oil pulling.

best coconut oil for oil pulling.


This article contains affiliate links. Whenever you buy something through one of these, I get a small commission, without any extra cost to you.  Thank You!

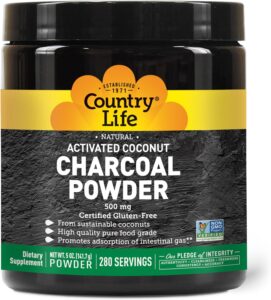
In the realm of natural health remedies, activated charcoal has garnered significant attention for its myriad benefits. While its uses span from water filtration to skin care, taking activated charcoal orally offers a range of advantages that might surprise you. Here’s a closer look at why incorporating this natural remedy into your routine could be beneficial.activated charcoal

1. Detoxification

Activated charcoal is renowned for its detoxifying properties. When taken orally, it works by binding to toxins and chemicals in the gut, preventing their absorption into the bloodstream. This process is particularly useful in cases of accidental poisoning or drug overdoses, where activated charcoal can help eliminate harmful substances from the body quickly and efficiently.

2. Alleviating Gas and Bloating

If you suffer from digestive discomfort, activated charcoal may provide relief. By trapping gas molecules and reducing bloating, it can make a noticeable difference in how you feel after meals. Its porous structure allows it to absorb excess gas produced by bacteria in the intestines, thus easing symptoms of indigestion.

3. Improving Kidney Function

Activated charcoal has shown promise in improving kidney function, particularly in individuals with compromised kidneys. It can help filter out toxins that the kidneys struggle to eliminate, reducing the overall toxin load in the body. This benefit is particularly significant for those with chronic kidney disease, offering a complementary approach to traditional treatments.

4. Oral Health Booster

Surprisingly, activated charcoal can also contribute to better oral health. Its natural abrasive quality helps to whiten teeth by removing surface stains, while its antibacterial properties can reduce bad breath and prevent cavities. Using activated charcoal as part of your oral hygiene routine can leave you with a brighter smile and fresher breath.

5. Lowering Cholesterol Levels

Preliminary research suggests that activated charcoal may help reduce cholesterol levels. By binding to bile acids in the gut, it can prevent their reabsorption and promote their excretion. This process may lower overall cholesterol levels, contributing to better heart health.

6. Anti-Aging Properties

Activated charcoal’s ability to remove toxins and impurities from the body can also have anti-aging effects. By reducing the oxidative stress caused by free radicals, it can help slow down the aging process and promote a healthier, more youthful appearance.

How to Take Activated Charcoal

When incorporating activated charcoal into your routine, it’s important to do so safely and effectively. Here are some tips:

  • Dosage: Follow the recommended dosage on the product label or consult with a healthcare professional. Typically, 500-1000 mg per day is considered safe for general use.
  • Timing: Take activated charcoal between meals and not in conjunction with other supplements or medications, as it can interfere with their absorption.
  • Hydration: Drink plenty of water when taking activated charcoal to help flush out the bound toxins and prevent constipation.

Precautions

While activated charcoal offers many benefits, it’s important to use it responsibly. Overuse can lead to side effects such as constipation, black stools, and, in rare cases, dehydration. Always consult with a healthcare provider before starting any new supplement, especially if you have underlying health conditions or are taking other medications.

Activated charcoal is a versatile and powerful natural remedy with a host of oral benefits. From detoxifying the body and relieving digestive discomfort to improving kidney function and boosting oral health, its applications are vast and varied. By incorporating activated charcoal into your health regimen wisely, you can harness its benefits and support your overall well-being.

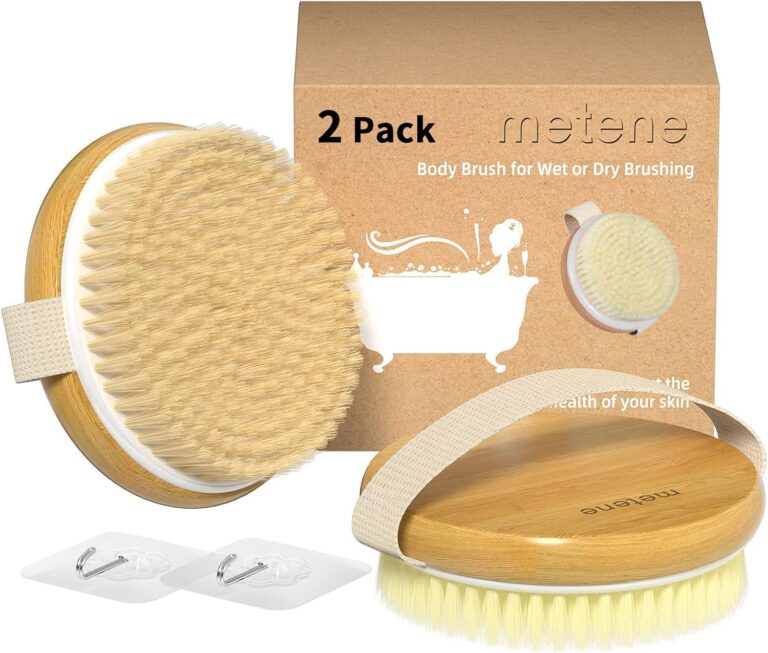
How to Dry Brush

Materials Needed

  • A natural-bristle brush: Choose a brush with stiff, natural bristles. Some brushes have a long handle for hard-to-reach areas.
  • A comfortable space: Find a spot where you can comfortably stand or sit, preferably in the bathroom or another easy-to-clean area.Dry Brush

Step-by-Step Guide

  1. Start with Dry Skin: Dry brushing should always be done on dry skin, typically before a shower.
  2. Begin at the Feet: Start brushing at your feet, using long, sweeping motions. Brush upward toward your heart to encourage lymphatic drainage and improve circulation.
  3. Move to the Legs: Continue brushing your legs with the same upward strokes, paying attention to areas that might need extra exfoliation, like the knees and thighs.
  4. Brush the Torso: Once your legs are done, move to your torso. For your stomach and back, use circular, clockwise motions. Brush gently around sensitive areas like the chest and abdomen.
  5. Arms and Hands: Brush from your hands up to your shoulders. Again, use long, upward strokes toward the heart.
  6. Neck and Shoulders: Finish with your neck and shoulders, using lighter pressure in these more sensitive areas.
  7. Shower: After dry brushing, take a shower to wash away the dead skin cells. Alternate between warm and cold water to further stimulate blood circulation.
  8. Moisturize: After your shower, apply a natural moisturizer like coconut oil or shea butter to hydrate your skin.

Benefits of Dry Brushing

1. Exfoliation

Dry brushing helps remove dead skin cells, revealing softer, smoother skin. This natural exfoliation process can lead to a brighter complexion and may help prevent ingrown hairs.

2. Improved Circulation

The brushing motion stimulates blood flow, which can improve circulation throughout the body. Better circulation ensures that nutrients and oxygen are efficiently delivered to cells, promoting overall health.

3. Lymphatic Support

Dry brushing is known to support the lymphatic system, which is crucial for immune function. By stimulating lymph flow, dry brushing helps in the removal of toxins and waste products from the body, potentially boosting immunity and overall health.

4. Reduced Cellulite Appearance

Some people find that regular dry brushing can reduce the appearance of cellulite. The massage effect of dry brushing may help break down fat deposits under the skin and distribute them more evenly, leading to smoother skin.

5. Stress Relief

The rhythmic, repetitive motion of dry brushing can be relaxing and meditative, helping to reduce stress. This practice can also energize the body, making it a great addition to a morning routine.

6. Enhanced Skin Health

By removing dead skin cells and stimulating blood flow, dry brushing can enhance overall skin health. Regular practice may result in firmer, more elastic skin.

Tips for Effective Dry Brushing

  • Frequency: Aim to dry brush 2-3 times a week. Overdoing it can lead to skin irritation.
  • Brush Care: Clean your brush regularly with soap and water to remove dead skin cells and bacteria. Allow it to air dry completely before the next use.
  • Pressure: Adjust the pressure according to your skin’s sensitivity. The brush should not cause pain or irritation.
  • Consistency: Like any skincare routine, consistency is key. Incorporate dry brushing into your regular routine to see the best results.

Dry brushing is a simple and natural way to support skin health, improve circulation, and promote overall well-being. By following the proper technique and incorporating it into your routine, you can enjoy the many benefits this ancient practice offers. Remember to listen to your body and adjust the pressure and frequency as needed to ensure a positive experience.


My Favorite Dry Brush

This article contains affiliate links. Whenever you buy something through one of these, I get a small commission, without any extra cost to you.  Thank You!

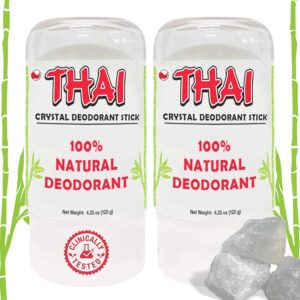
In a world where we are increasingly conscious of what we put on our bodies, the search for effective natural products is on the rise. Among these, natural deodorants are gaining popularity, offering a safer and more sustainable alternative to traditional antiperspirants. One standout in this category is the THAI Crystal Deodorant Stick. Let’s dive into why this natural deodorant might just be the best choice for you.

What is THAI Crystal Deodorant Stick?

The THAI Crystal Deodorant Stick is a natural deodorant made from crystallized mineral salts. Unlike conventional deodorants that mask odor with fragrances or prevent sweating with aluminum compounds, this product works by creating an invisible layer of protection on your skin, inhibiting the growth of odor-causing bacteria.

Benefits of Using THAI Crystal Deodorant Stick

  1. Natural Ingredients: The THAI Crystal Deodorant Stick is made from natural mineral salts, which are free from harmful chemicals, synthetic fragrances, and artificial preservatives. This makes it a safer option for those with sensitive skin or allergies.
  2. Effective Odor Protection: While it doesn’t stop you from sweating (which is a natural and healthy process), it effectively prevents the growth of bacteria that cause body odor. This means you stay fresh throughout the day without compromising your body’s natural functions.
  3. Long-Lasting: One application can last up to 24 hours, providing all-day protection. Plus, the stick itself can last for several months, making it a cost-effective option.
  4. Eco-Friendly: THAI Crystal Deodorant Stick is not only good for your body but also for the environment. The product is often packaged in minimal, recyclable materials, reducing your carbon footprint.
  5. Stain-Free: Unlike some traditional deodorants and antiperspirants, this crystal deodorant doesn’t leave any stains or residues on your clothing. Say goodbye to those annoying white marks!

How to Use THAI Crystal Deodorant Stick

Using the THAI Crystal Deodorant Stick is simple:

  1. Wet the Top: Before applying, wet the top of the stick with water.
  2. Apply to Clean Skin: Rub it gently on your clean, dry underarms. The water helps to dissolve a tiny layer of the mineral salts, which then coats your skin.
  3. Dry the Stick: After use, dry the top of the stick and store it in a dry place. This helps to maintain its longevity and effectiveness.

Why Choose THAI Crystal Deodorant Stick?

If you’re transitioning to a natural lifestyle or looking for a healthier alternative to chemical-laden deodorants, the THAI Crystal Deodorant Stick is an excellent choice. It’s a product that aligns with holistic and sustainable living, ensuring you feel fresh and confident without compromising your health or the environment.

Customer Testimonials

Many users have praised the THAI Crystal Deodorant Stick for its effectiveness and longevity. Here are a few testimonials:

  • Amanda L.: “I’ve tried numerous natural deodorants, and THAI Crystal is by far the best. It keeps me odor-free all day, even during my workouts.”
  • John M.: “I was skeptical at first, but this deodorant stick works wonders. No more embarrassing odor, and it lasts forever!”
  • Sophia R.: “I love that it’s natural and doesn’t irritate my sensitive skin. Plus, it doesn’t stain my clothes. Highly recommend!”

Switching to the THAI Crystal Deodorant Stick is a small but significant step towards a healthier and more sustainable lifestyle. With its natural ingredients, effective odor protection, and eco-friendly packaging, it’s no wonder why it’s considered one of the best natural deodorants on the market. Give it a try and experience the benefits for yourself!

THAI crystal deodorant stick- CLICK HERE TO PURCHASE

This article contains affiliate links. Whenever you buy something through one of these, I get a small commission, without any extra cost to you.  Thank You!
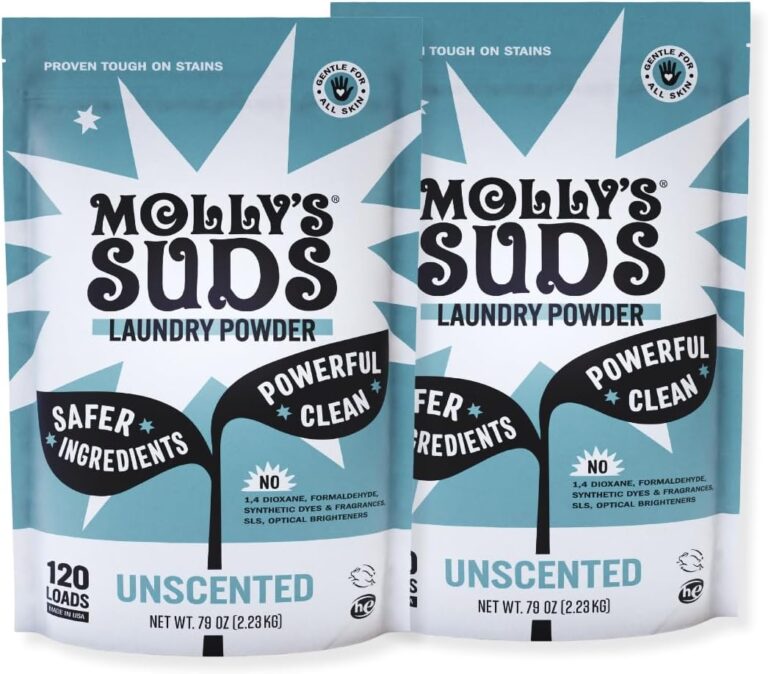
Laundry day can often feel like a never-ending chore, but it doesn’t have to be a burden when you have the right tools. Molly’s Suds, my absolute favorite laundry detergent that has transformed the way I approach this household task. If you’re looking for a detergent that is effective, eco-friendly, and gentle on both your clothes and the planet, then let me introduce you to the wonders of Molly’s Suds.

Why I Love Molly’s Suds

**1. Natural Ingredients: One of the standout features of Molly’s Suds is its commitment to using only natural, non-toxic ingredients. Unlike many conventional detergents that are loaded with harsh chemicals, Molly’s Suds is formulated with the health of your family and the environment in mind. Ingredients like sodium carbonate, magnesium sulfate, and organic peppermint essential oil make it safe and gentle, even for those with sensitive skin.  I have eczema and this has been a saving grace for my sensitive skin.

Molly's Suds Laundry Detergent

**2. Powerful Cleaning Performance: Don’t let its gentle nature fool you—Molly’s Suds packs a punch when it comes to cleaning power. It effectively removes stains, dirt, and odors from your clothes, leaving them fresh and spotless. Whether you’re dealing with everyday grime or tough stains, Molly’s Suds gets the job done without the need for synthetic additives.

**3. Eco-Friendly and Sustainable: In today’s world, making environmentally conscious choices is more important than ever. Molly’s Suds excels in this area by offering a product that is not only biodegradable but also comes in eco-friendly packaging. The company’s commitment to sustainability means you can feel good about reducing your carbon footprint with every load of laundry.

**4. Hypoallergenic Formula: For families with sensitive skin or allergies, finding the right laundry detergent can be a challenge. Molly’s Suds is hypoallergenic and free from common irritants like artificial fragrances, dyes, and phosphates. This makes it a safe choice for everyone, including babies and those with eczema or other skin conditions.

**5. Cost-Effective and Long-Lasting: A little goes a long way with Molly’s Suds. Each bag is highly concentrated, meaning you need only a small amount per load to achieve great results. This makes it an economical choice that provides excellent value for your money. Plus, its long-lasting formula means fewer trips to the store and less packaging waste.

Tips for Getting the Most Out of Molly’s Suds

To maximize the benefits of Molly’s Suds, here are a few tips I’ve found helpful:

  • Use Cold Water: For most loads, cold water is sufficient and helps to conserve energy. Molly’s Suds is effective at all temperatures, so you can feel confident using it in cold water.
  • Pre-Treat Stains: For particularly stubborn stains, pre-treating with a small amount of Molly’s Suds mixed with water can help lift the stain before washing.
  • Follow Dosage Instructions: Because Molly’s Suds is so concentrated, be sure to follow the recommended dosage instructions to avoid using too much detergent.

Molly’s Suds has truly revolutionized the way I do laundry. Its natural, powerful, and eco-friendly formula makes it a standout choice in a market flooded with synthetic options. By choosing Molly’s Suds, you’re not only taking care of your clothes and your health, but you’re also making a positive impact on the environment. If you haven’t tried it yet, I highly recommend giving Molly’s Suds a chance—you might just find that laundry day becomes a little more enjoyable.

Molly’s Suds Laundry Detergent

This article contains affiliate links. Whenever you buy something through one of these, I get a small commission, without any extra cost to you.  Thank You!
Delicate arch in Moab Utah

Arches National Park, located in southeastern Utah, is home to over 2,000 natural stone arches, each with its own unique charm. Among these, Delicate Arch stands out as an iconic symbol of the American Southwest, attracting hikers, photographers, and nature lovers from around the globe. If you’re planning a visit, timing your hike to Delicate Arch can make a significant difference in your experience. Here’s a comprehensive guide on the best times to embark on this memorable journey.

Sunrise: A Serene Start to the Day

Why Hike at Sunrise? Hiking to Delicate Arch at sunrise offers a tranquil experience, often with fewer crowds. The soft, early morning light bathes the arch in a warm, golden hue, creating a picturesque scene perfect for photography. Additionally, cooler temperatures in the morning make the hike more comfortable, especially during the hot summer months.

What to Expect:

  • Peaceful Atmosphere: The early hours of the day are generally quieter, allowing you to enjoy the natural beauty and solitude of the landscape.
  • Optimal Lighting for Photography: The low angle of the sun casts long shadows and highlights the texture and form of the arch, making for stunning photographs.
  • Cooler Temperatures: Morning hikes can be more pleasant, as temperatures are often significantly lower than in the afternoon.

Tips for a Sunrise Hike:

  • Start your hike about an hour before sunrise to reach the arch in time for the first light.
  • Bring a headlamp or flashlight, as the trail can be dark in the early morning.
  • Dress in layers, as early morning temperatures can be chilly, especially outside the summer months.

Sunset: A Spectacular Finale

Why Hike at Sunset? Sunset is another magical time to visit Delicate Arch. As the sun descends, the arch glows a fiery red-orange, creating a dramatic and breathtaking sight. While the trail can be busier at this time, the payoff is a view that’s hard to beat.

What to Expect:

  • Stunning Colors: The setting sun enhances the red rock’s natural color, providing a vibrant backdrop for your photos.
  • Cooler Evenings: Similar to mornings, the evening temperatures are cooler than the peak afternoon heat, making for a more comfortable hike.
  • Livelier Atmosphere: While more people might be on the trail, the shared experience of watching the sunset can be quite enjoyable and communal.

Tips for a Sunset Hike:

  • Bring a flashlight or headlamp for the hike back, as it will be dark once the sun sets.
  • Arrive at the trailhead at least two hours before sunset to allow ample time for the hike and to find a good spot to watch the sunset.
  • Pack a light jacket, as temperatures can drop quickly after the sun goes down.

Seasonal ConsiderationsHike up to delicate arch at arches national park in Moab Utah.

Spring and Fall: Ideal Hiking Seasons

  • Temperate Weather: Spring (March to May) and fall (September to November) offer the most moderate and pleasant weather conditions for hiking.
  • Wildflowers and Foliage: Spring brings blooming wildflowers, adding splashes of color to the landscape, while fall showcases the changing colors of the foliage.

Summer: Early Morning or Late Evening

  • Beat the Heat: Summer temperatures can soar well over 100°F (38°C), making midday hikes dangerous. Stick to early morning or late evening hikes to avoid the extreme heat.
  • Stay Hydrated: Regardless of the time of day, always carry plenty of water and wear sunscreen to protect yourself from the sun.

Winter: A Unique Experience

  • Fewer Crowds: Winter offers a more solitary experience with fewer visitors.
  • Snowy Scenery: Occasionally, a dusting of snow adds a magical touch to the red rock formations.
  • Variable Conditions: Be prepared for colder temperatures and possible snow or ice on the trail. Check the weather forecast and trail conditions before heading out.

No matter when you choose to hike Delicate Arch, the experience is sure to be unforgettable. By timing your visit to either sunrise or sunset and considering the seasonal weather, you can maximize your enjoyment and safety on the trail. Remember to pack accordingly, stay hydrated, and respect the natural beauty of Arches National Park. Happy hiking!

My Favorite hiking boots.

This article contains affiliate links. Whenever you buy something through one of these, I get a small commission, without any extra cost to you.  Thank You!
 

Flying with young children can be challenging, especially when it comes to managing their discomfort during takeoff and landing. Ear pain, caused by rapid changes in air pressure, is a common issue that can make a flight particularly difficult for infants, toddlers, and children. Here are some effective strategies to help your little one avoid ear pain on an airplane, ensuring a smoother and more enjoyable travel experience for the whole family.baby crying on airplane from cabin pressure. Ear pain on airplane. How to help alleviate ear pain for your children on an airplane.

Understanding the Cause of Ear Pain

Ear pain during flights is primarily due to the inability of the Eustachian tubes to equalize pressure between the middle ear and the cabin. This is especially problematic during ascent and descent when the pressure changes are most significant. Young children have narrower and less developed Eustachian tubes, making them more susceptible to this discomfort.

Tips for Infants (0-1 Year)

1. Nursing or Bottle Feeding: Feeding your baby during takeoff and landing can help alleviate ear pain. The sucking and swallowing motions help open the Eustachian tubes, allowing the pressure to equalize. If your baby is not hungry, a pacifier can also be effective.

2. Keep the Baby Awake: Try to keep your baby awake during takeoff and landing. A sleeping baby won’t swallow as frequently, which can prevent the Eustachian tubes from opening.

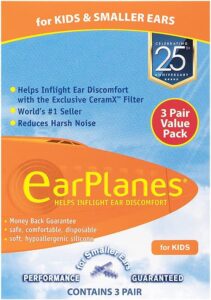
3. Use Ear Protection: Specially designed earplugs for infants, like EarPlanes, can help regulate ear pressure. These are soft and safe for little ears and can be very effective.

Tips for Toddlers (1-3 Years)

1. Encourage Drinking: Give your toddler a drink during takeoff and landing. The act of swallowing helps to open the Eustachian tubes. Use a sippy cup or a bottle, whichever your child prefers.

2. Snacks: Chewing on snacks like crackers or small pieces of fruit can also help. The motion of chewing and swallowing aids in pressure equalization.

3. Distraction: Sometimes, distraction can help alleviate anxiety and reduce the perception of ear pain. Bring along favorite toys, books, or download some engaging apps on a tablet.

4. Ear Protection: Consider using child-sized earplugs or noise-canceling headphones. These can help reduce the discomfort associated with pressure changes.

Tips for Older Children (3+ Years)

1. Educate Them: Explain what will happen during takeoff and landing and teach them how to yawn, swallow, or gently blow their nose with their mouth closed (the Valsalva maneuver) to help equalize ear pressure.

2. Provide Gum or Hard Candy: Chewing gum or sucking on hard candy can be very effective. The repetitive motion of chewing or sucking encourages swallowing, which helps open the Eustachian tubes.

3. Hydrate: Encourage your child to drink plenty of fluids during the flight. Swallowing liquids frequently can help alleviate ear pain.

Earplanes. How to avoid ear pain on airplanes for children.
Click on the piocture to get Earplanes

4. Use Ear Protection: Older children can use regular earplugs or specially designed pressure-regulating earplugs like EarPlanes. Noise-canceling headphones can also be beneficial, especially if your child is sensitive to noise.

General Tips for All Ages

1. Plan for Takeoff and Landing: Timing your interventions is crucial. Be ready to implement these strategies during the 30 minutes of ascent and descent when pressure changes are most pronounced.

2. Stay Calm: Children can pick up on their parents’ anxiety. Stay calm and reassure your child that everything is okay. Your calm demeanor can help soothe their nerves.

3. Consult Your Pediatrician: If your child has a cold, ear infection, or sinus infection, flying can exacerbate ear pain. Consult your pediatrician before the flight for advice or potential medication to alleviate discomfort.

With a little preparation and the right strategies, you can help your infant, toddler, or child avoid ear pain during a flight. Remember to keep them hydrated, encourage swallowing, and use appropriate ear protection. By addressing these needs proactively, you can ensure a more comfortable and enjoyable journey for both you and your child. Safe travels!

Click here for my list of essentials for Traveling with infants, toddlers and children.

This article contains affiliate links. Whenever you buy something through one of these, I get a small commission, without any extra cost to you.  Thank You!
Summer is here, and with it comes the irresistible urge to explore new destinations, soak up the sun, and create unforgettable memories. Whether you’re planning a beach vacation, a mountain retreat, or a city adventure, ensuring your safety is paramount. Here’s a comprehensive guide to help you travel safely and make the most of your summer escapades.

Plane flying over the ocean, travel abroad

1. Plan Ahead and Stay Informed

Before embarking on your journey, research your destination thoroughly. Understand the local customs, laws, and current travel advisories. Websites like the U.S. State Department or the Centers for Disease Control and Prevention (CDC) provide valuable information on travel alerts and health advisories.

2. Pack Smart

Packing efficiently can save you a lot of hassle. Make a checklist of essential items, including:

  • Travel documents: Passport, visa, travel insurance, and copies of these documents.
  • Medications: Bring enough prescription medications for the duration of your trip, plus a little extra.
  • First aid kit: Include basics like band-aids, antiseptic wipes, pain relievers, and any necessary personal medication.
  • Sun protection: Sunscreen, sunglasses, and a wide-brimmed hat to protect against UV rays.

3. Health Precautions

Health precautions are crucial for a safe trip. Follow these tips:

  • Vaccinations: Ensure you’re up-to-date on routine vaccines and any specific ones required for your destination.
  • Sanitization: Carry hand sanitizer and disinfectant wipes. Clean frequently touched surfaces and wash your hands regularly.

4. Stay Hydrated and Eat Wisely

Summer heat can lead to dehydration, so drink plenty of water. Avoid excessive alcohol and caffeinated drinks as they can contribute to dehydration. When dining out, choose reputable restaurants to minimize the risk of foodborne illnesses. If you’re traveling to a destination where tap water is not safe to drink, opt for bottled water.

5. Protect Your Belongings

Tourist hotspots can attract petty crime. Keep your belongings secure:

  • Money and valuables: Use a money belt or neck pouch to keep cash, cards, and important documents safe.
  • Bags: Always keep an eye on your bags. In crowded areas, carry your backpack on your front or use an anti-theft bag.
  • Hotel safety: Use the hotel safe for valuables and ensure your room is locked securely when you leave.

6. Transportation Safety

Whether you’re driving, flying, or using public transport, prioritize safety:

  • Car rentals: Choose reputable rental companies and inspect the vehicle for any issues before driving. Familiarize yourself with local traffic laws.
  • Flights: Arrive at the airport early to allow time for security checks and avoid rushed situations.
  • Public transport: Stay vigilant in stations and on vehicles. Keep personal items close and be aware of your surroundings.

7. Outdoor Activities

If your summer plans include outdoor activities, ensure you’re well-prepared:

  • Hiking: Wear appropriate footwear, carry a map, and inform someone of your plans.
  • Water sports: Use life jackets, follow safety guidelines, and avoid alcohol when participating in water activities.
  • Heat protection: Take breaks in shaded areas, wear light, breathable clothing, and use sunscreen generously.

8. Stay Connected

Keep in touch with family and friends back home. Share your itinerary with them and check in regularly. In case of an emergency, they will know your whereabouts and how to reach you.

9. Emergency Preparedness

Know the local emergency numbers of your destination. Have a plan in place for potential situations such as medical emergencies, natural disasters, or losing your passport. Travel insurance can offer peace of mind by covering unexpected incidents.

Safe summer travel requires a blend of preparation, vigilance, and adaptability. By following these tips, you can minimize risks and focus on enjoying your adventure to the fullest. So, pack your bags, put on your adventure hat, and embark on a summer journey that is as safe as it is exciting. Happy travels!

Must have items for traveling abroad

This article contains affiliate links. Whenever you buy something through one of these, I get a small commission, without any extra cost to you.  Thank You!
As the days grow longer and the air gets warmer, there’s nothing quite like the feeling of summer. It’s the season of sun-soaked adventures, spontaneous road trips, beach days, and lazy afternoons. But what truly brings summer to life is the perfect soundtrack. If you’re looking to capture that sun-kissed vibe, look no further than the “Summer Hits 2024 Playlist” on Spotify. This collection of tunes is designed to encapsulate the essence of summer in every beat and melody.

Spotify playlist, summer playlist 2024, summer hits 2024 playlist, indie pop, country music, rock n roll

The Perfect Companion for Every Summer Moment

Road Trips and Open Roads
Imagine this: the windows are down, the breeze is warm, and you’re driving down a scenic route with your closest friends. The “Summer Hits 2024 Playlist” is packed with upbeat, feel-good tracks that turn any drive into an unforgettable journey. These songs are perfect for singing along at the top of your lungs, making every moment on the road feel like a scene from a summer movie.

Beach Vibes and Poolside Chilling
Whether you’re lounging by the pool or catching waves at the beach, the playlist offers a variety of tracks that perfectly complement the sound of crashing waves and the warmth of the sun. From chill, relaxed beats to lively anthems, these songs will have you feeling like you’re on a tropical getaway, no matter where you are.

Sunset Serenades
As the sun sets and the sky is painted with hues of pink and orange, the playlist seamlessly transitions to match the mellow, magical ambiance of summer evenings. These tracks provide the perfect backdrop for watching the sunset, with melodies that evoke a sense of calm and contentment.

Summer Parties and Late-Night Bonfires
No summer is complete without those memorable gatherings with friends and family. Whether it’s a backyard barbecue, a spontaneous dance party, or a cozy bonfire, the “Summer Hits 2024 Playlist” has you covered. The energetic, dance-worthy tunes ensure that the party keeps going long after the sun has gone down.

A Playlist That Evolves with Your Summer

One of the best things about the “Summer Hits 2024 Playlist” is its dynamic nature. Updated regularly, it keeps you in tune with the latest hits and emerging artists, ensuring that your summer soundtrack stays fresh and exciting. Each addition is carefully curated to maintain the perfect summer vibe, so you can trust that every track will enhance your seasonal experience.

Why This Playlist Stands Out

Versatility and Variety
The “Summer Hits 2024 Playlist” doesn’t stick to one genre. It beautifully blends pop, rock, indie, and even a touch of reggae and EDM, offering something for everyone. This diversity ensures that whether you’re in the mood for something energetic or laid-back, you’ll find the perfect song to match your summer moment.

Curated for Perfection
Crafted by Spotify’s music experts, this playlist is more than just a random assortment of songs. Each track is handpicked to evoke the feeling of summer, from the infectious rhythms to the uplifting lyrics. This thoughtful curation means that you’re getting a premium listening experience that feels cohesive and intentional.

Connecting Memories with Music
Music has an incredible ability to anchor our memories. By the end of the season, the tracks from the “Summer Hits 2024 Playlist” will likely be intertwined with your best summer moments. Whether it’s a song that played during a pivotal moment on your trip or a beat that became the anthem of your summer nights, this playlist helps create lasting memories.

As you embark on your summer adventures, let the “Summer Hits 2024 Playlist” be your soundtrack. It’s more than just music; it’s the heartbeat of the season, bringing every moment to life with its perfect blend of rhythms and melodies. So, put on your sunglasses, grab your headphones, and dive into the sounds of summer. Your perfect summer experience awaits.